Introduction
Having a menu and sub menus with links is very normal in a Web application. Typically, we create static menu and menu items. But sometimes we need dynamic menus when we do not know what the menu names and links will be called.
Having a menu and sub menus with links is very normal in a Web application. Typically, we create static menu and menu items. But sometimes we need dynamic menus when we do not know what the menu names and links will be called.
In this article, we will see how to create dynamic menu and sub menus in an ASP.NET application.
Mainly in CMS application we require to customary web layout, Menu and Submenu Items. In this article you learn how to dynamically add Menu and Sub Menu Links for our Web Application.
Step 1: Create Database say (Database.mdf)
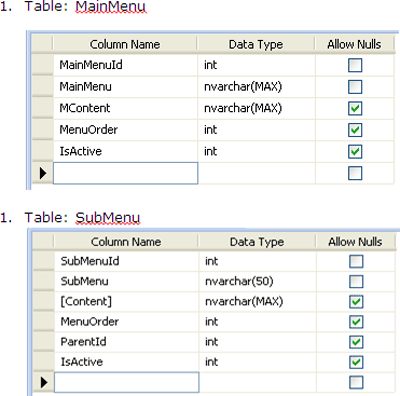
Add 2 tables to the database - MainMenu and SubMenu. The table design looks like the following:
Step 2: add ConnectionString in web.config. as given below.<connectionStrings>
<add name="ConnectionString" connectionString="Data Source=.; AttachDbFilename= DynamicallyControlCreationOfMenuSubmenuItems \App_Data\Database.mdf;User ID=**;Password=*****;Pooling=False" providerName=".NET Framework Data Provider for SQL Server"/></connectionStrings>
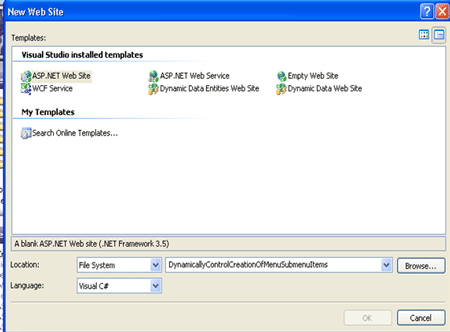
Step 3: Open Visual Studio 2005/2008->File->New Website
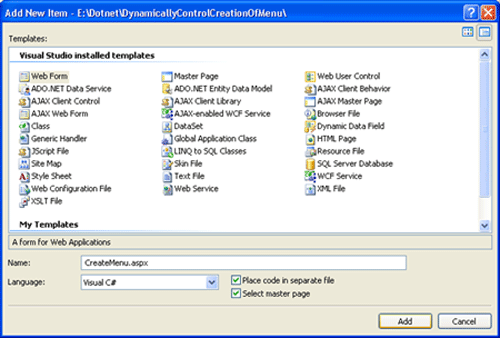
Step 4: Open Solution Explorer ->Add New item
Add CreateMenu.aspx
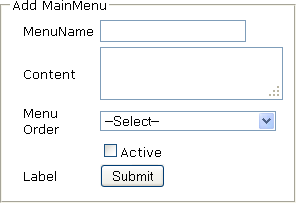
Step 5: Design the page and Place required Controls in it. As you can see from this design, a user can enter a Menu name, content, order and activate it. Same applies to the sub menu except the fact that user will have to select a main menu.
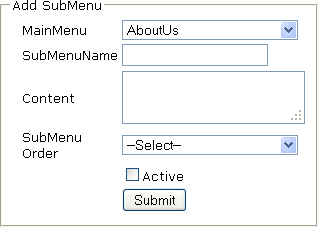
Step 6: Add Main Menu Items by double click on submit Button -> Now write the below code. protected void btnMainmenu_Click(object sender, EventArgs e)
{
int active;
if(chkMActive.Checked)
{
active=1;
}
else {
active=0;
}SqlConnection conn = new SqlConnection(connection);string sql = "INSERT INTO MainMenu(MainMenu, MContent, MenuOrder, IsActive)VALUES('"+txtMainmenu.Text+"','"+ txtMContent.Text +"',"+Convert.ToInt16 ( ddlMOrder.SelectedItem.Value)+","+ active+")";
SqlCommand cmd = new SqlCommand(sql, conn);
conn.Open();
cmd.CommandType = CommandType.Text;
cmd.ExecuteNonQuery();
conn.Close();
FillddlMainMenu() ;
Response.Redirect("SuccessMsg.aspx"); }
Step 7: Adding Submenus Items.
Step 1: Create Database say (Database.mdf)
Add 2 tables to the database - MainMenu and SubMenu. The table design looks like the following:

Step 2: add ConnectionString in web.config. as given below.<connectionStrings>
<add name="ConnectionString" connectionString="Data Source=.; AttachDbFilename= DynamicallyControlCreationOfMenuSubmenuItems \App_Data\Database.mdf;User ID=**;Password=*****;Pooling=False" providerName=".NET Framework Data Provider for SQL Server"/></connectionStrings>
Step 3: Open Visual Studio 2005/2008->File->New Website

Step 4: Open Solution Explorer ->Add New item
Add CreateMenu.aspx

Step 5: Design the page and Place required Controls in it. As you can see from this design, a user can enter a Menu name, content, order and activate it. Same applies to the sub menu except the fact that user will have to select a main menu.


Step 6: Add Main Menu Items by double click on submit Button -> Now write the below code. protected void btnMainmenu_Click(object sender, EventArgs e)
{
int active;
if(chkMActive.Checked)
{
active=1;
}
else {
active=0;
}SqlConnection conn = new SqlConnection(connection);string sql = "INSERT INTO MainMenu(MainMenu, MContent, MenuOrder, IsActive)VALUES('"+txtMainmenu.Text+"','"+ txtMContent.Text +"',"+Convert.ToInt16 ( ddlMOrder.SelectedItem.Value)+","+ active+")";
SqlCommand cmd = new SqlCommand(sql, conn);
conn.Open();
cmd.CommandType = CommandType.Text;
cmd.ExecuteNonQuery();
conn.Close();
FillddlMainMenu() ;
Response.Redirect("SuccessMsg.aspx"); }
Step 7: Adding Submenus Items.
- For this we first need to populate dropdown of Main Menu. Below is the code. protected void Page_Load(object sender, EventArgs e)
{
if (!IsPostBack)
{
FillddlMainMenu();}}public void FillddlMainMenu(){
SqlConnection conn =new SqlConnection(connection);
DataSet DS =new DataSet();
SqlDataAdapter dataadapter =new SqlDataAdapter();
SqlCommand cmd =new SqlCommand("Select MainMenuId,MainMenu from MainMenu", conn);//cmd.CommandType = CommandType.Text;dataadapter.SelectCommand = cmd;dataadapter.Fill(DS);ddlMainMenu.DataSource = DS;ddlMainMenu.DataBind();}
- Double click on submit Button -> Now write the below code. protected void btnSubmenu_Click(object sender, EventArgs e)
{
int active;
if (chkSActive.Checked)
{
active = 1;
}
else {
active = 0;
}
SqlConnection conn =new SqlConnection(connection);
string sql ="INSERT INTO SubMenu(SubMenu, Content, MenuOrder,ParentId, IsActive)VALUES('" + txtSubmenu.Text +"','" + txtSContent.Text +"'," +Convert.ToInt16(ddlSOrder.SelectedItem.Value) +"," +Convert.ToInt16(ddlMainMenu.SelectedItem.Value) + "," + active +")";
SqlCommand cmd =new SqlCommand(sql, conn);
conn.Open();
cmd.CommandType = CommandType.Text;
cmd.ExecuteNonQuery();
conn.Close();
Response.Redirect("SuccessMsg.aspx"); }
Step 8: Now to Show Menu Items we need to add another page. Add 2 Data lists for Main Menu(Horizontally) Submenus Items(Vertically).
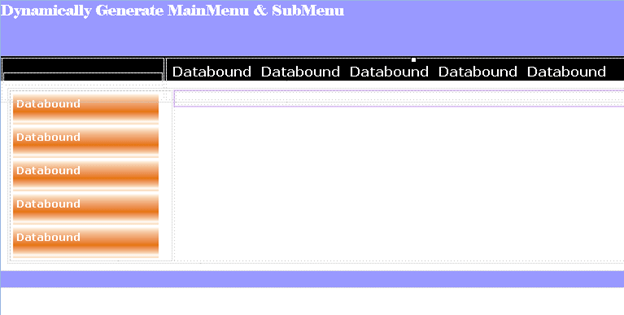
Step 9: Now Write Code for populating Main Menu Items in datalist to show as menuBar. protected void Page_Load(object sender, EventArgs e)
{
FillMenu();
}
public void FillMenu()
{
DataSet ds = new DataSet();
SqlConnection conn = new SqlConnection(connection);
SqlDataAdapter dataadapter = new SqlDataAdapter();
SqlCommand cmd = new SqlCommand("Select * from MainMenu ORDER BY MenuOrder", conn);
{
DataSet ds = new DataSet();
SqlConnection conn = new SqlConnection(connection);
SqlDataAdapter dataadapter = new SqlDataAdapter();
SqlCommand cmd = new SqlCommand("Select * from MainMenu ORDER BY MenuOrder", conn);
//cmd.CommandType = CommandType.Text; dataadapter.SelectCommand = cmd;
dataadapter.Fill(ds);
return ds;
dlSubMenu.DataSource = ds1;
dlSubMenu.DataBind(); }
Description: Above code will help to show main menu items as the page loads.
Now we need to populate submenus on selected mainmenu link. We will write code on datalist ItemCommand event.
Step 10: datalist ->Properties ->Add ItemCommand Event.protected void dlMenu_ItemCommand(object source, DataListCommandEventArgs e)
{
LinkButton lnkLink = e.Item.FindControl("lnkLink") as LinkButton;
Label lblPageId = e.Item.FindControl("lblpageId") as Label;
Session["Sublink"] = lblPageId.Text;
if (lnkLink.Text != null)
LinkButton lnkLink = e.Item.FindControl("lnkLink") as LinkButton;
Label lblPageId = e.Item.FindControl("lblpageId") as Label;
Session["Sublink"] = lblPageId.Text;
if (lnkLink.Text != null)
{
Session["Choice"] = "Main";
Session["Choice"] = "Main";
DataSet ds1 = new DataSet();
SqlConnection conn = new SqlConnection(connection);
SqlDataAdapter dataadapter = new SqlDataAdapter();
SqlCommand cmd = new SqlCommand("Select * from SubMenu where IsActive=1 and ParentId='" + Convert.ToInt16(lblPageId.Text) + "' ORDER BY MenuOrder", conn);
dataadapter.SelectCommand = cmd;
dataadapter.Fill(ds1);
dlSubMenu.DataSource = ds1;
dlSubMenu.DataBind();
dlSubMenu.DataBind();
} }
Step 11: Run application (Press F5).
Summary
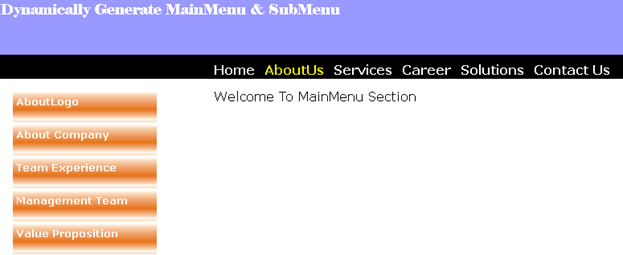
The Final Layouts Will be as given Below.
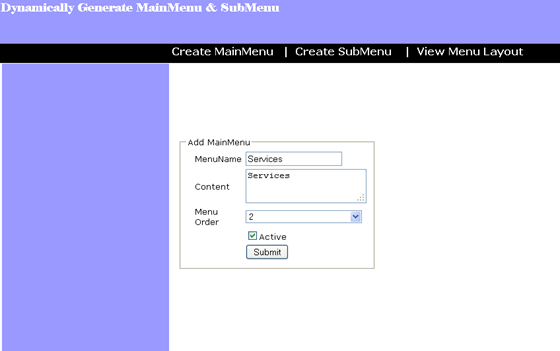
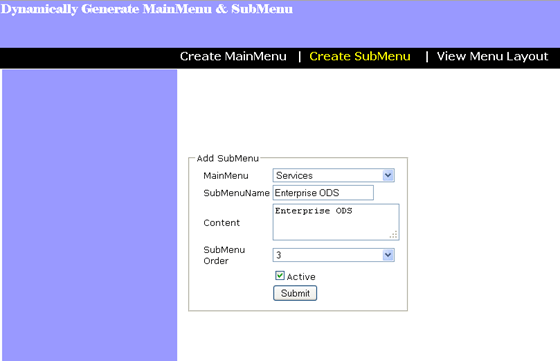

Summary
Step 11: Run application (Press F5).
Summary
The Final Layouts Will be as given Below.


Summary
In this article, we discussed how to create a Web site with dynamic menus. The menus and related links were stored in a database and the menus were created at run-time by reading values from the database.
You can Download The Source Code From C#Corner.First you have to be a user of C#corner.Then You can Download it after login there.
 Download Files:


